7 Home Theater Setup Mistakes That Ruin Sound Quality
The projector warms up, the room lights drop, and the first big scene arrives sounding wrong in a way nobody can name. Dialogue sits buried under the score until someone reaches for the remote during every quiet exchange, bass thunders in the left seat of the sectional and goes missing in the right one, and a helicopter that should track across the ceiling instead hovers vaguely near the television. None of that is a broken speaker. It is a home theater setup that was assembled around the furniture and the wall outlets rather than around the way sound actually behaves in a room.
Design a Home Theater That Sounds as Good as It Looks
Flanner’s Home Entertainment has been designing, installing, and calibrating custom audio and video systems for Milwaukee area homes for decades. Hear complete theater systems in our demo rooms, then let our team handle the design, the in-wall work, and the calibration.
Here is the part most people are relieved to hear: the equipment is rarely the weak link. Placement, room behavior, and a handful of menu settings account for the majority of disappointing systems our team is called out to fix, and every one of those is correctable. At Flanner’s Home Entertainment, our custom AV designers plan, install, and calibrate theaters across the Milwaukee area, from finished basements in Wauwatosa to great rooms in Mequon. This guide walks through seven mistakes in order of how much damage they do: speaker placement, subwoofer position, skipped calibration, untreated rooms, seating layout, wiring and configuration errors, and the one that catches owners of older Milwaukee homes off guard.
Key Takeaways
- Placement beats price: Where the speakers and subwoofer sit changes what you hear far more than moving up one model tier, and it costs nothing to correct.
- Calibration is not optional: Distances, levels, crossovers, and room correction turn a pile of good components into a coherent system, and an unverified auto-calibration run often leaves real performance on the table.
- The room is a component: Bare drywall, tile, glass, and an open floor plan actively work against your speakers, and modest acoustic treatment usually buys more improvement per dollar than a speaker upgrade.
- One wrong setting can cost you everything: A system fully capable of immersive audio will quietly play compressed stereo for years if one cable or one source menu is wrong.
Mistake One: Placing Speakers Where Furniture Allows Instead of Where Sound Demands
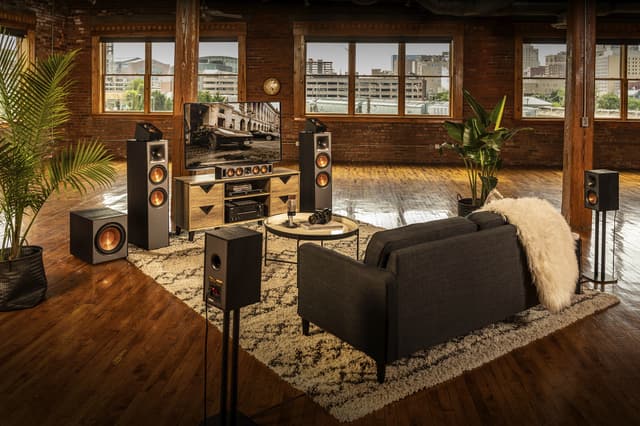
This is the most common home theater setup error by a wide margin. The left speaker goes beside the bookcase, the right one goes wherever the corner allows, the center gets tucked inside a media cabinet, and the surrounds end up wherever the existing wiring came out of the wall. The speakers are now arranged around the room’s furniture instead of around the listening position, and every one of them is working against the others.
The target is simple to describe. The front left and right speakers and your main seat should form a rough equilateral triangle, meaning the distance between the two speakers is close to the distance from each speaker to your ears. Tweeters belong near ear height when you are seated, not aimed at your shins from a low stand or over your head from a high shelf. Both sides need matching distance, matching height, and matching angle, because the brain builds a soundstage out of tiny timing differences between your two ears.
The Center Channel Deserves Its Own Rules
Roughly two-thirds of a movie soundtrack comes out of the center channel, so it is the speaker that determines whether dialogue is intelligible. Get it as close to screen height as the cabinet allows and angle it up or down toward seated ear level if it cannot sit there naturally.
What ruins it:
- Burying the center inside a closed cabinet, where the enclosure adds boom and the door filters out consonants
- Setting it behind a soundbar shelf, a grille, or a row of components that block the tweeter
- Placing it far below the screen and never angling it toward the seats
- Pushing it hard against a back panel, which reinforces the low midrange and makes voices thick
Surround Angle, Height, and Toe-In
For a 5.1 layout, surrounds belong slightly behind and to the sides of the main seat, a foot or two above ear height, angled down toward the listening area. In a 7.1 surround sound setup, the side surrounds sit roughly beside the seats and the rear pair goes behind them, splitting the work so effects can travel smoothly around the room. Surrounds placed directly above the seats or crammed into rear corners collapse the soundstage into a narrow band across the front.
Toe-in is the quiet variable. Aiming the front speakers straight ahead usually widens the sweet spot while softening imaging precision. Aiming them directly at the main seat sharpens imaging and narrows the sweet spot to one chair. Small changes matter here, so move in increments of a few degrees and listen to a familiar voice recording between adjustments.
When the Room Genuinely Cannot Cooperate
Most placement advice assumes an empty dedicated theater. Real Milwaukee living rooms have a fireplace on one wall, a window on another, and a sectional that only fits one way. The honest order of priority when you have to compromise: protect symmetry first, ear height second, and exact distance last. Two speakers at slightly wrong distances but equal heights and equal wall relationships will still image well, because your receiver can correct distance in software. Two speakers with wildly different boundary conditions, one in a corner and one in open space, will sound mismatched no matter what the calibration says.
Read More: 5 Mistakes to Avoid When Buying a Speaker Home Theater System | Surround Sound 101: What You Need to Know
Mistake Two: Dropping the Subwoofer in the Nearest Corner and Calling It Done
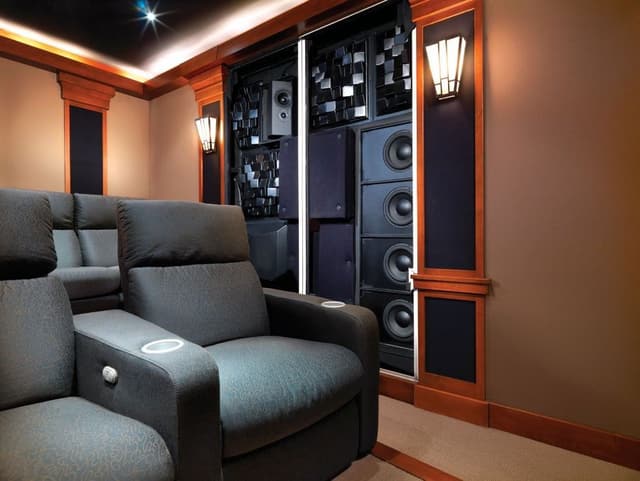
Subwoofer position influences what you hear more than subwoofer price does. Low frequencies have wavelengths measured in feet, so they bounce between parallel walls and reinforce or cancel themselves at predictable spots in the room. Those room modes are why bass booms in one seat and thins out one cushion over, and why a well-reviewed subwoofer can sound bloated in your basement and tight in the showroom.
The corner is where nearly every subwoofer lands, and there is a reason it works: corner loading gives you the most output for the least money. It also tends to excite every room mode at once, which trades evenness for volume. That is a defensible choice for a budget system in a large room and a poor one in a small, square basement theater.
Run the Subwoofer Crawl This Weekend
The fix costs nothing but an afternoon. Put the subwoofer on your main seat, play a bass-heavy track or a movie scene on repeat, then crawl the perimeter of the room on your hands and knees with your ear near floor level. Where the bass sounds most even and defined rather than loudest, that is where the subwoofer goes. The physics works in both directions, so a spot that sounds good from the seat position sounds good in reverse.
Two smaller subwoofers almost always beat one larger one, and not because of volume. A second subwoofer placed on the opposite wall or diagonally across the room fills in the nulls the first one leaves behind, which smooths bass response across every seat instead of one. That is the single most effective upgrade for a family room where three or four people watch together.
Settings That Quietly Undo Good Placement
- Leaving the subwoofer’s own low pass filter engaged while the receiver is also managing the crossover, which stacks two filters and hollows out the upper bass
- Setting the phase control by guesswork instead of by listening at the crossover point from the main seat
- Running the gain so high that the subwoofer is doing the work your main speakers should handle
- Sitting the subwoofer inside a cabinet or on a suspended wood floor, where the enclosure and the joists resonate along with it and definition disappears
Separate the goal of more bass from the goal of better bass. More bass comes from corners and gain knobs. Better bass comes from position, a second subwoofer, and an honest crossover.
Read More: What Is a Powered Subwoofer & Do You Need One? | What to Know Before Buying Klipsch Subwoofers
Mistake Three: Skipping Calibration and Trusting the Default Settings
A receiver arrives from the factory assuming every speaker is identical, equidistant, and in a neutral room. None of that is true in your house. Calibration is the step that tells the system what it is actually driving: the distance to each speaker, the output level of each channel, the crossover point where each speaker hands bass to the subwoofer, and the correction filters that address the room’s own coloration.
Automatic room correction has become genuinely capable, but the result is only as good as the measurement. The microphone needs to sit at ear height at the main seat on a tripod, not held in a hand or balanced on a cushion. The room needs to be quiet, which means the furnace, the dehumidifier, and the dishwasher are off. Most systems ask for multiple measurement positions across the seating area, and skipping them produces a system tuned perfectly for one chair and awkwardly for every other.
The Errors That Undermine AV Receiver Calibration
- Running the routine once from a single position and never repeating it after moving speakers or furniture
- Holding the microphone by hand, which adds reflections off your body and arm
- Leaving speakers set to Large when they cannot reproduce deep bass, which starves the subwoofer and strains the mains
- Accepting the results without listening to a familiar scene afterward to confirm anything improved
Bass management is worth understanding in plain terms. A crossover setting tells the system where to stop asking a speaker for bass and start asking the subwoofer. Most bookshelf and in-ceiling speakers are happiest handing off around 80 Hz, which protects small drivers from excursion they cannot handle and lets the subwoofer do what it was built for. Setting everything to Large because it sounds more impressive is how people end up with distorted mains and an idle subwoofer.
Level matching is the last mile. Auto calibration sets channel levels by measurement, but dialogue clarity is partly a taste question, and a small manual bump of one or two decibels on the center channel is the most common adjustment our calibrators make after an automatic run.
A Verification Routine You Can Run in Ten Minutes
- Play the receiver’s test tones and confirm each channel is audible from its correct physical location.
- Play a familiar dialogue-heavy scene and check whether voices sit centered on the screen without reaching for the volume.
- Play a scene with panning effects and follow the movement around the room with your eyes closed.
- Walk the room during a bass-heavy passage and note how much the level changes between seats.
- Compare your speaker distance settings in the menu against a tape measure, since a badly reflective room can fool the microphone.
Professional calibration goes further than any consumer routine can, using measurement microphones and analysis software that show response curves, decay times, and phase behavior the onboard system never displays. That is the difference between a system that measures acceptably and one that has been tuned deliberately.
Mistake Four: Ignoring the Room Itself
The room is not a container for your home theater setup. It is an active part of it, and in many houses it is the limiting factor. Sound leaves the speaker, hits every hard surface, and arrives at your ears a second and third time, milliseconds late. Those reflections are what make an expensive system sound harsh, vague, or hollow.
The usual offenders are easy to identify. Bare drywall and large windows create bright, harsh reflections. Hardwood and tile floors add slap echo that smears detail. Open floor plans let bass escape into the kitchen instead of building in the room. Small, square rooms produce the most severe room modes of all, which is why some of the worst-sounding systems live in the tidiest little basement theaters.
Finding First Reflection Points
Have someone slide a hand mirror along the side wall while you sit in the main seat. Every spot where you can see a speaker’s driver in the mirror is a first reflection point, and that is where absorption does the most good. Repeat the exercise on the ceiling and, if the floor is hard, on the floor in front of the speakers.
Livable room acoustics treatment does not mean covering the walls in foam:
- An area rug with a pad between the speakers and the seats, which handles the floor bounce
- Heavy lined drapes across windows, which you can open when the room is not in use
- Upholstered seating rather than leather and wood, which absorbs rather than reflects
- A loaded bookshelf on the rear wall, which scatters sound instead of bouncing it straight back
- Fabric-wrapped absorption panels at the side wall reflection points
- Bass traps in the room corners, which do more for a small room than any other single treatment
Ceiling construction decides how well immersive formats work. In-ceiling height speakers need to be positioned and angled toward the listening area rather than dropped wherever the joists happened to allow, and upward-firing modules depend entirely on a flat, hard, reflective ceiling. A vaulted or beamed ceiling, which shows up constantly in Milwaukee remodels, will scatter that reflected sound and produce disappointing Dolby Atmos height speaker placement no matter which modules you buy.
Do not overlook the noise floor either. HVAC vents dumping air into the room, a projector fan overhead, and an equipment rack humming in the corner all raise the baseline of quiet, and every decibel of background noise is a decibel of detail you no longer hear.
Read More: 7 Ceiling Speaker Ideas for Better Whole-Home Sound | How to Install In-Wall Speakers
Mistake Five: The Wrong Seating Distance, Layout, and Screen Relationship
Where you sit is a speaker placement decision, whether you treat it as one or not. The single worst position in most rooms is the one people choose first: the sofa pushed flat against the back wall. Bass pressure builds against boundaries, so that seat gets a heavy, one-note low end, and surround effects that should wrap around you arrive from directly behind your head instead.
Pulling the seating even a foot or two off the rear wall changes bass response dramatically and gives rear surrounds room to work. Two to three feet is better. This is often the highest-value change available in a family room, and it requires nothing but moving furniture.
Symmetry matters as much as distance. The main listening position should sit centered between the side walls and equidistant from the front left and right speakers. A seat pushed toward one wall hears that wall’s reflections earlier and louder, which pulls the entire soundstage in that direction.
Seating Distance and Screen Size
Viewing distance and audio immersion are linked, because a screen that fills more of your field of view makes on-screen sound cues feel anchored rather than detached. A practical starting point is a seating distance of roughly one and a half to two and a half times the screen’s diagonal for a 4K display, sitting closer as resolution and screen quality go up. Then verify that the audio still works from that spot, because moving the couch forward for the picture can move it out of the surround field.
Multi-Row and Real Family Rooms
Two rows means compromise, and the trick is choosing which row wins. Calibrate for the primary row, then use a riser of roughly eight to twelve inches for the back row so sightlines clear and the rear seats sit inside the surround field rather than against the wall. Keep the back row off the rear wall for the same bass reasons.
When the couch genuinely cannot move, these compensations actually help:
- Move the subwoofer instead of the seat, using the crawl method from the fixed listening position
- Add bass trapping in the corners nearest the seating, which tames the boundary buildup
- Raise surround speakers higher and angle them down over tall seat backs and chaise sections
- Use in-ceiling surrounds when a sectional physically blocks side wall placement
- Add a rug and absorption at the first reflection points, since a fixed seat makes those points predictable
Mistake Six: Cutting Corners on Wiring, Sources, and System Configuration
Everything up to this point is about physics you can hear. This mistake is about details that quietly subtract performance before the signal ever reaches a speaker. Home theater wiring mistakes rarely announce themselves. The system still plays, so nobody suspects anything is wrong.
The physical layer comes first. Long in-wall speaker runs need heavier gauge wire, because thin wire over distance adds resistance that costs you damping and output. Connections need to be tight and consistent in polarity, since a single reversed pair thins the bass and blurs the center image. HDMI cables on long runs need to be certified for the bandwidth you are asking them to carry, and an uncertified cable that works fine at one resolution will drop audio formats or produce intermittent picture dropouts at another.
Configuration is where the free wins live:
- Set your streaming device and disc player to pass bitstream audio to the receiver rather than letting the source or the television downmix it, which is the most common reason a system capable of immersive audio plays compressed stereo instead.
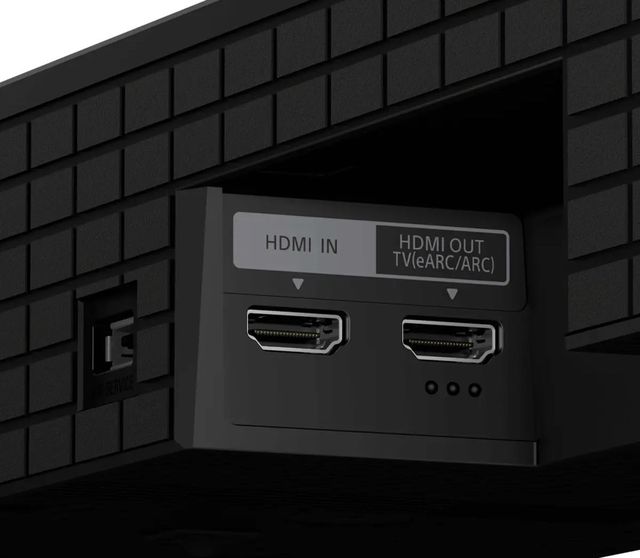
- Verify the audio return channel path, since connecting through the wrong port or an older cable can strip a lossless surround format down to two channels without any warning on screen.
- Confirm the receiver’s speaker impedance setting matches the speakers, and be honest about amplifier headroom, because underpowering larger speakers produces compression and distortion long before it produces damage.
- Give the equipment rack real ventilation, since heat is the leading cause of premature failure in receivers and processors.
- Put the system behind proper power conditioning and surge protection, especially in areas that see summer storms roll off Lake Michigan.
Plan in-wall and in-ceiling runs before the drywall goes up, and use in-wall rated cable where code requires it. Pulling one extra conduit or one spare cable run during construction costs a few dollars and saves an entire project three years later.
Common Home Theater Setup Mistakes and Their Fixes Compared
Find the row that matches what you actually hear, then look across at what causes it and what fixing it takes. The symptom column is the entry point, because most people notice a result long before they suspect a cause.
| Mistake | What You Hear | Underlying Cause | DIY Difficulty | Cost Level | Improvement |
|---|---|---|---|---|---|
| Speaker placement | Vague imaging, thin dialogue | Speakers arranged around furniture | Easy | Free | Large |
| Subwoofer position | Boomy in one seat, thin in another | Room modes and corner loading | Easy | Free | Large |
| Skipped calibration | Uneven levels, buried center | Factory defaults and unverified auto setup | Moderate | Free to low | Large |
| Untreated room | Harsh, echoey, fatiguing sound | Bare walls, hard floors, no bass trapping | Moderate | Low to moderate | Large |
| Seating and layout | No envelopment, heavy bass at the couch | Seats against the rear wall or off center | Easy | Free | Moderate |
| Wiring and configuration | Compressed stereo instead of surround | Wrong source setting or uncertified cable | Moderate | Free to low | Moderate |
Work top down. The first three rows cost nothing but time and account for most of the gap between a disappointing system and a great one, which is why they are the right place to start before anyone talks about new equipment.
DIY Home Theater Setup Pros and Cons Worth Considering
The real decision is not whether to buy good equipment. It is whether to handle the design, installation, and calibration of a home theater setup yourself or bring in a custom AV integrator who does it every week. Both paths produce good systems, and both have honest limits worth knowing before the drywall is open.
Pros
Lower upfront cost:
Doing the labor yourself removes design and installation fees from the project, which leaves more of the budget for speakers and electronics.
You learn the system deeply:
Setting the crossovers and levels yourself means you understand every menu, so future changes and troubleshooting do not require a phone call.
Freedom to experiment:
Nothing stops you from spending three weekends moving the subwoofer and re-running calibration, and that patient trial and error genuinely improves results.
The satisfaction of dialing it in:
Hearing a scene finally lock into place because of a change you made is a real part of the hobby for a lot of owners.
Cons
Measurement and calibration have a ceiling:
Consumer auto setup cannot show you decay times, phase behavior, or the difference between a room problem and a speaker problem, so past a certain point you are guessing.
Structural and wiring mistakes are expensive:
In-wall and in-ceiling runs that skip code-rated cable, miss a stud bay, or land a height speaker at the wrong angle are corrected with drywall repair rather than a settings change.
Mistake Seven: Fighting a Century-Old Milwaukee House Instead of Working With It
Milwaukee’s housing stock is unusually old and unusually well built, and both of those facts change how a home theater setup behaves. Bungalows and Polish flats across Bay View, Riverwest, and the near west side were framed with real dimensional lumber and finished in plaster over wood lath, not drywall over studs. Plaster is dense and rigid, so it reflects high frequencies harder than drywall does and gives many of these rooms a bright, lively character that makes an otherwise neutral speaker sound edgy. Those same houses have radiators under the windows instead of ducted returns, tall narrow window openings, and basements with low ceilings, exposed joists, and a furnace sharing the room. The basement theater is the most popular project in the city and the most acoustically demanding, because a low, hard-surfaced rectangular room with a concrete floor produces exactly the reflections and room modes that ruin sound quality.
What actually works in these houses:
- Treat plaster walls as more reflective than drywall and budget for absorption at the first reflection points from the start rather than as an afterthought.
- Fish wire through the balloon-framed cavities of an older home only after checking for fire blocking, since many Milwaukee houses have it and many do not, and the answer changes the entire wiring plan.
- Use radiator placement to your advantage by planning speaker positions around them early, because a cast iron radiator under a window is a fixed object no layout will move.
- In a basement, carpet or rug the concrete floor before buying anything else, since a hard floor plus a low ceiling is the worst reflection combination in residential audio.
- Expect exposed floor joists overhead to scatter the reflections upward-firing height modules depend on, which makes in-ceiling height speakers the more reliable path in an unfinished basement ceiling.
- Account for forced-air retrofits and ductwork added later, since undersized returns and a furnace in the theater room raise the noise floor more than owners expect.
Home Theater Gear That Solves These Setup Problems at Flanner’s
Every system below addresses a specific problem covered above, whether that is dialogue that disappears into the score, bass that only works in one seat, or height effects that never leave the front wall. These are the soundbar-based systems on our floor, chosen because they simplify placement and calibration for rooms where a full component installation is not the right answer. For separates, in-wall and in-ceiling designs, and full theater builds, our custom AV team can design the whole system with you.
Sony® BRAVIA Theater 13 Channel Black Soundbar
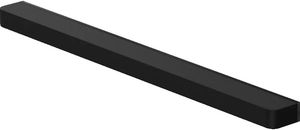
This is the answer for a room where the height layer has never worked. Thirteen channels of processing in a single bar means front, side, and overhead information is handled by dedicated drivers rather than borrowed from the front three, so effects travel across the ceiling instead of hovering near the screen. It is the flagship of Sony’s BRAVIA Theater soundbar line, and it suits a large open room where in-ceiling speakers are not an option and the ceiling itself is flat enough to reflect height channels properly. Pair it with a wireless subwoofer positioned by the crawl method for even bass.
Top Features
- 13 channel processing: Height and surround information gets its own dedicated channels rather than being simulated from a stereo pair.
- Flagship BRAVIA Theater tier: The most capable single-bar system in this lineup for immersive formats.
- Dialogue-focused center performance: A dedicated center section addresses the muffled dialogue problem covered earlier without a separate speaker.
- Expandable with wireless components: Rear speakers and a subwoofer can be added later without new wiring in the walls.
Sony® BRAVIA Theater 11 Channel Black Soundbar
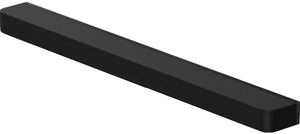
Most rooms do not need thirteen channels, and this eleven channel bar is where the value sits in the BRAVIA Theater line. It delivers the same core benefit, which is real separation between front, surround, and height information, in a package sized for a typical living room rather than a great room. If the article’s speaker placement section described your situation, meaning a room where wiring five speakers is not realistic, this is the practical path to a genuine surround field. Add wireless rears when you are ready and the front stage stays exactly as calibrated.
Top Features
- 11 channel immersive processing: Enough dedicated channels for convincing overhead and surround effects in a normal room.
- Single-bar front stage: Left, center, and right stay perfectly matched in height and distance, which solves the symmetry problem automatically.
- Wireless expansion path: Rear speakers and subwoofers connect without running wire through finished plaster walls.
- Streamlined setup: Fewer physical variables mean fewer chances for the placement errors described earlier.
Sony® 5.0.2 Channel Black Soundbar
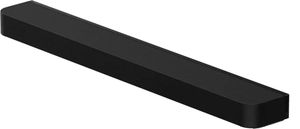
The 5.0.2 designation tells you exactly what this bar does: five main channels, no built-in subwoofer, and two dedicated height channels. That configuration is aimed at the listener who cares about the overhead layer and wants to choose their own subwoofer rather than accept a bundled one, which is the right instinct given how much subwoofer position and quality shape the result. It suits a medium room with a flat ceiling, and it is a strong fit for anyone who read the bass section and decided to do that part properly.
Top Features
- Two dedicated height channels: Overhead effects come from drivers built for the job rather than from processing tricks.
- Five main channels: A full front and surround stage in one bar, with matched voicing across all five.
- Bring your own subwoofer: Leaving the low end to a separate sub means you control placement, which is where bass quality is actually decided.
- Flat ceiling dependency handled: Upward-firing height performance is best in rooms with the hard, flat ceilings common in Milwaukee’s newer builds.
LG® 9.1.5 Channel Black Soundbar

Fifteen total channels in a soundbar system is a serious commitment to immersive audio, and this is the most ambitious LG configuration in this group. Nine main channels, one subwoofer channel, and five height channels means the overhead layer alone carries more separation than many complete surround systems manage in total. It fits a large family room where the seating spreads wide and a single pair of height effects would leave the outer seats out of the experience. This is the choice for the reader whose main complaint was a collapsed soundstage.
Top Features
- Five height channels: The widest overhead coverage in this lineup, which keeps outer seats inside the effect field.
- Nine main channels: Front, side, and rear information stay distinct instead of blending into a wall of sound.
- Included subwoofer channel: Low frequency output is part of the system rather than an add-on decision.
- Large room scaling: Built for wide seating arrangements where a compact bar runs out of coverage.
Sony® 3.1 Channel Soundbar
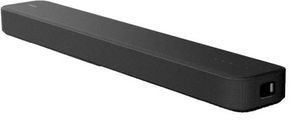
If the dialogue problem is the reason you are reading this, start here. The 3.1 configuration means a dedicated center channel handles voices rather than blending them into a stereo mix, which is the single most effective fix for a television whose speakers swallow every conversation. The point one is a subwoofer channel for the low end that flat panel televisions cannot produce at all. It suits a bedroom, a den, or a first upgrade in a main living room, and it is the least complicated way to solve the most common complaint in this entire article.
Top Features
- Dedicated center channel: Dialogue gets its own driver, which is exactly what a television’s built-in speakers lack.
- Subwoofer channel included: Real low frequency support without adding a separate component decision.
- Simple placement: One bar under the screen removes almost every placement variable discussed earlier.
- Compact room fit: Well matched to dens, bedrooms, and smaller living rooms where a full system would be overkill.
LG® 3.1. Channel Black Soundbar
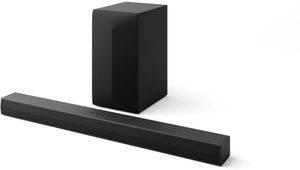
The same dialogue-first logic in LG’s lineup, aimed at the shopper who wants a center channel and real bass without stepping up in price. Three main channels plus a subwoofer channel covers the two failures that make television audio frustrating, which are unintelligible voices and no low end at all. It is a natural match for an LG television, where the remote and settings menus work together, and it fits a bedroom, a basement rec room, or a condo where a large system would be more than the space needs.
Top Features
- Three channel front stage: Left, center, and right in one bar, so voices stay anchored to the screen.
- Included subwoofer channel: Adds the bottom octaves a flat panel cannot reproduce.
- Straightforward integration: Designed to work cleanly alongside LG displays and their control system.
- Right-sized for smaller rooms: Enough system for a den or bedroom without crowding it.
LG® 2.1. Channel Black Soundbar

This is the entry point, and it is honest about what it does. Two main channels and a subwoofer channel give you wider stereo separation and real bass compared with the drivers built into a television, which is a meaningful improvement in a kitchen, a guest room, or a home office. It does not have a dedicated center channel, so if dialogue clarity is your primary complaint, step up to a 3.1 configuration instead. For secondary rooms where the goal is simply better sound than the television offers, it does that job well.
Top Features
- Two channel plus subwoofer: Wider sound and real bass without the footprint of a larger system.
- Compact footprint: Fits under smaller displays and in rooms where a full-width bar would look out of place.
- Simple connection: A single cable to the television and a wireless subwoofer keeps installation quick.
- Secondary room value: The practical choice for kitchens, offices, and guest rooms rather than a main theater.
Avoid These Home Theater Setup Mistakes and Hear Every Detail
Placement and room behavior shape sound quality more than almost any shopper expects, calibration is what turns good components into a coherent system, and a single wrong setting can hide capability you already paid for. The seven mistakes above are the ones our installers correct most often, and every one of them is fixable. The equipment on your rack is probably better than what you are currently hearing from it.
Come hear the difference in person. Flanner’s Home Entertainment has dedicated listening and theater demo rooms where you can compare complete systems before buying, our custom AV designers plan systems around your actual room, and our installers handle in-wall and in-ceiling work, professional installation, and precision calibration with real measurement tools. That is a different experience from ordering boxes online and being left to guess at placement and settings, and it comes with local service and support from a Milwaukee company years after the sale. Schedule a consultation or stop in for a demo and hear what your movies are supposed to sound like.
Frequently Asked Questions about Home Theater Setup
The best subwoofer placement is the position that produces the most even bass across your seats, which is usually found by putting the subwoofer on the main seat, playing a bass-heavy passage, and crawling the room perimeter to listen for where it sounds tightest. Corners produce the most output but often the least even response, so a corner is a volume decision rather than an accuracy decision, and adding a second subwoofer on an opposite wall smooths response better than upgrading to one larger model.
Muffled dialogue almost always traces to the center channel, either because it is enclosed in a cabinet, blocked by a shelf or grille, aimed away from ear level, or set too low relative to the other channels after calibration. Raising the center channel level by one or two decibels and clearing anything in front of the tweeter fixes the majority of cases without any new equipment.
A crossover point around 80 Hz works well for most bookshelf, satellite, and in-ceiling speakers, because it hands deep bass to the subwoofer while keeping the main speakers within the range they handle cleanly. Larger floorstanding speakers can often cross over lower, near 60 Hz, but setting speakers to Large and asking them to reproduce full bass usually costs you both output and clarity compared with proper bass management.
Two to three feet of clearance between the primary seating and the rear wall is a good target, since bass pressure builds against boundaries and a seat pushed flat against the wall gets heavy, uneven low end. That same gap gives rear surround speakers room to work, so effects arrive from around you rather than from directly behind your head.
Every room affects sound quality, and rooms with bare drywall or plaster, hard floors, and large windows benefit dramatically from even modest treatment such as an area rug, lined drapes, and absorption at the first reflection points. Room acoustics treatment typically delivers more audible improvement per dollar than a speaker upgrade, because it addresses the reflections that were degrading the speakers you already own.
Automatic room correction handles distances, levels, and basic filtering well, but it cannot show you decay times, phase behavior, or whether a problem originates in the room or the speaker. Professional calibration with measurement microphones and analysis software finds and corrects what the onboard routine leaves behind, which is why it makes the biggest difference on systems where the equipment is already capable.
Why Trust Flanners Home Entertainment?
When you choose Flanner’s Home Entertainment, you're trusting a deeply rooted, family-owned legacy that dates back to 1891 a company that has evolved from a piano and sheet-music shop into a premier specialty retailer of high-end audio, video, and smart-home systems. With showrooms in West Allis and Northshore Grafton, Flanner’s combines decades of expertise and personalized service. Its team includes members with 15–30 years of industry experience to design and install tailored home theater, multi-room audio, networking, and control solutions. Over its more than 130-year history, the business has maintained its commitment to craftsmanship, reliability, and genuine customer relationships, making every system feel as thoughtfully built as the business itself.